Thursday 25 May 2017

Wednesday 24 May 2017

AV Vallejo Snow 73.820 vs AK interactive Snow texture paint

As you can see from the picture above, the A/V Vallejo Snow texture paint pellet is bigger than AK8011. Here I prefer AK one .

Closer look on Vallejo Snow texture


AK8009+AK8011


AK8025 rough terrain


AK8009 Snow sprinkle


AK8011 Snow terrain


Sunday 16 April 2017

First attempt on painting a resin base

First attempt on painting a resin base


This is how it looks like before painted.


Firstly, i prime the resin with AV Vallejo PU black primer. Then I dry brush with 5 colors. The final highlight is dry brush with Insignia White.

the colors that I used for dry brushing:
71.329 Green
71.290 US Earth Brown
71.005 Grey Blue
71.040 Burnt Umber
71.279 Insignia white


This is the result after dry brushing. The paint still looks a little wet.


Next I added some slimy grime to the rock with AK interactive product and blend in with Odourless Thinner.


Next I I added snowy effects with AK interactive Diorama series products.

After the AK interactive Snow effects fully cured


Monday 10 April 2017

AK Interactive Neutral Texture for Rough Terrain AK8025

AK Interactive Neutral Texture for Rough Terrain AK8025

Left: Straight from the pot, no color added; Right: Mixed with AV Vallejo Model Air Burnt Umber & US Earth Brown 1:1 mix

Left: Straight from the pot, no color added; Right: Mixed with AV Vallejo Model Air Burnt Umber & US Earth Brown 1:1 mix


When it is cured


Texture comparison with Snow Terrain texture

Monday 20 March 2017

T'aunar


T'aunar - Construction/Assembly/Magnetising Ideas


1. Screws are used to fasten up the feet to the base to ensure that it won't dislodge after a few tabletop match. (You don't want your heavy model fall on top your opponent's nicely painted models)


2. At the center of ball joint, 2mm hole was drilled. This is the point where you connect the upper leg part.


3.  Both the end of the leg pinned with 2mm brass rod


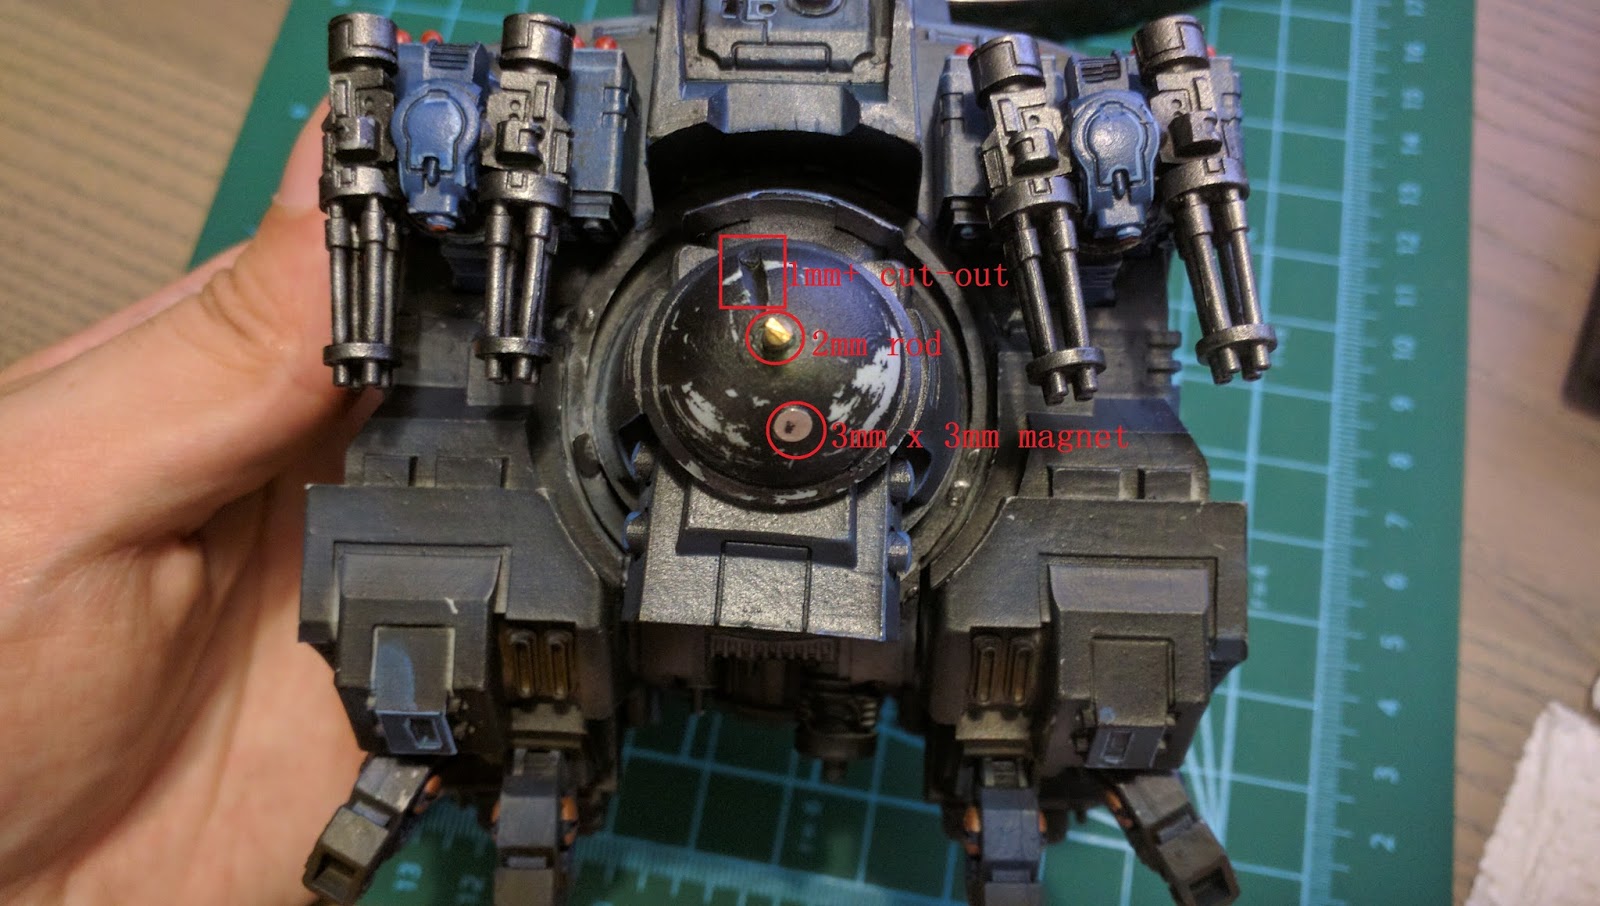
4. The upper torso is connected to the lower torso with 2mm brass rod and 3x3mm magnet. The function of the magnet and small cutout is to fix the torso facing direction so that it won't turn freely and annoy your opponent.

5. Body mounted Burst Cannon and Smart Missile System. 2pieces of 8x1mm magnets and 2pieces of 6x1mm magnets were used. In case in future there is a update to T'aunar defensive weapons, this gives you some flexibility in weapon swapping.


6. There are a few option for shoulder mounted cannon. Here is how I made the weapon swap-able.
2mm brass rod were used.


7. Well you want you model to be able to move around easily by keeping inside box or something. Instead of glued the Multi-Driver cannon to the mounting, I used 6x3mm magnets.


8. As for the arm I used 2pieces 8x2mm magnets, 1piece 6x2mm magnet. On the body side which connecting the hand, I used 2pieces 8x2mm magnets and 1piece 6x3mm magnet.


9. Finally this is the video on how the T'aunar assembled.